The best thing to do is shoot stable video right from the start, but we all know that that's not always possible. When you have shaky footage and can't reshoot, the best you can do is stabilize your video, choosing the most appropriate stabilization method.
Luckily, Final Cut Pro includes a stabilization feature to correct shaky video.
Today, we'll examine one of the easiest methods for stabilizing a video in Final Cut Pro: FCP's built-in stabilization tool.
Let’s dive in!
How to Stabilize Video in Final Cut Pro

Let’s start with the built-in stabilization features. Final Cut Pro has a built-in stabilizer but also offers a rolling shutter option to reduce rolling shutter distortion in your videos. However, this guide will focus on stabilizing a video with too much camera motion and creating a steady image.
-
Step 1: Prepare Your Footage
Import your video clip into Final Cut Pro and drag the clip to the timeline to begin editing.
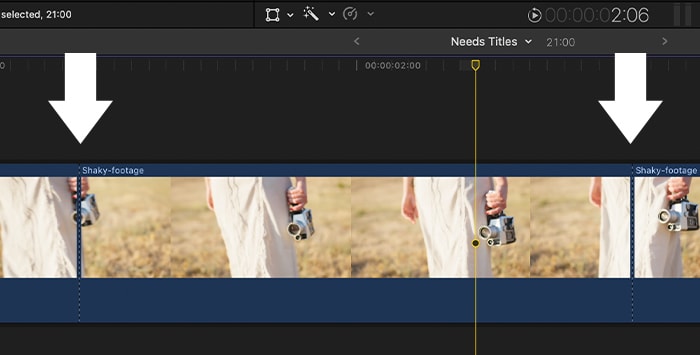
If shaky footage occurs at a specific time in the video clip and the video file is long, I recommend cutting the footage to isolate the area you want to stabilize.
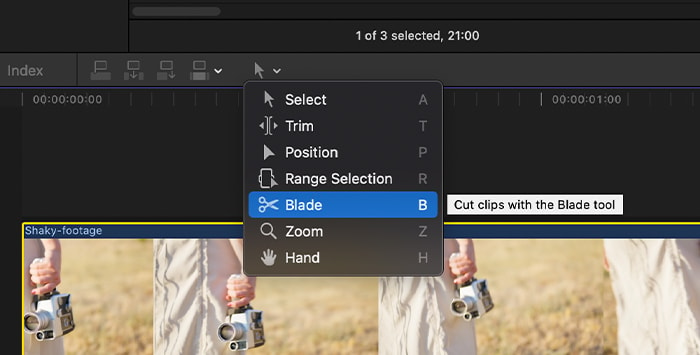
Select the Blade tool and cut before and after the shaky scene in the clip. This allows you to add image stabilization to that scene, not the entire video footage.
If you want to stabilize a longer clip, I suggest dividing the clip into smaller sections because the analysis can take a long time. This way, you'll know which settings will work best for your scene and can repeat the process with longer clips.
Select the clip you want to stabilize and open the video inspector window. To do so, go to Window > Show in Workspace > Inspector or click the inspector button in the side toolbar.
-
Step 2: Automatic Stabilization
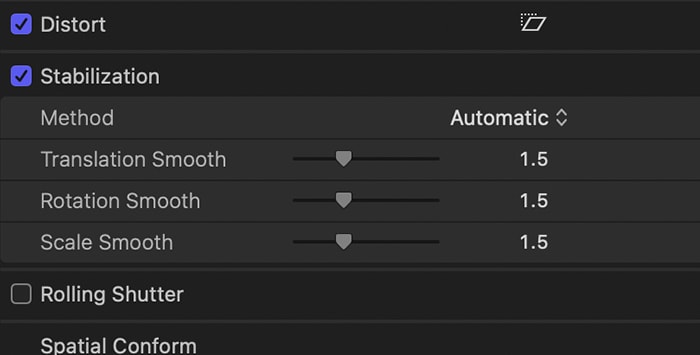
Once in the inspector panel, click the video button and scroll down until you see Stabilization. Click the checkbox to activate the Stabilization feature in your video clip, and Final Cut Pro will begin to analyze your footage.
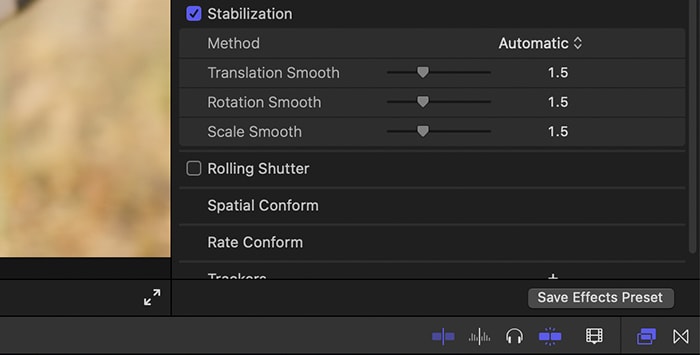
Final Cut Pro uses Automatic as the default stabilization method. This method analyzes the video, identifies motion distortion in your footage, and applies the best stabilization method. Then, it shows the settings for the chosen stabilization method.
-
Step 3: Stabilization Settings
After Final Cut Pro analyzes your footage, you can adjust the amount of stabilization applied. Below the Method parameter, you will find the settings for the InertiaCam or SmoothCam method.
Use the scale smooth slider to steady your footage. The higher the value in the sliders, the more Final Cut Pro will attempt to stabilize the video.
-
Step 4: Changing the Stabilization Method
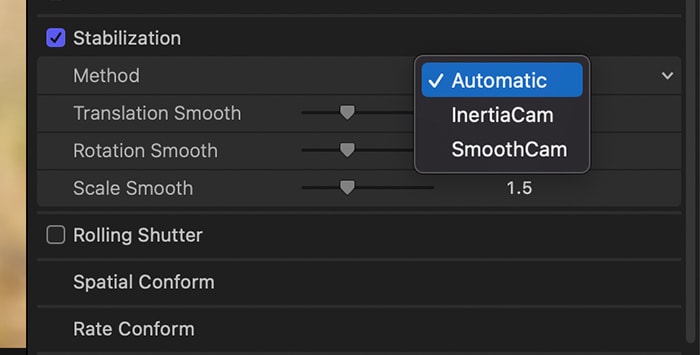
Final Cut Pro features two stabilization methods: InertiaCam and SmoothCam. If you know a specific method can improve the result, you can manually select it.
Click Automatic in the method setting to display the dropdown menu, and select the method you prefer.
Choose InertiaCam to optimize stabilization for footage with pans and zooms in camera movements. With this method, you can adjust Smoothing, and sometimes, it may enable a Tripod Mode option to simulate the effect of having the camera on a tripod.
The SmoothCam method analyzes the footage to determine the camera’s movement and direction. It provides sliders to make rotation and translation smooth, and scale for each frame to compensate for the camera movement.
-
Step 5: Remove Black Bars
When you stabilize a video with too much camera movement, the stabilization process can crop the video so much that black bars will appear on the edges. There are a few ways to remove and avoid black bars in the video footage.
- Adjust stabilization settings to make translation and rotation smooth, and scale to reduce the black bars in the result.
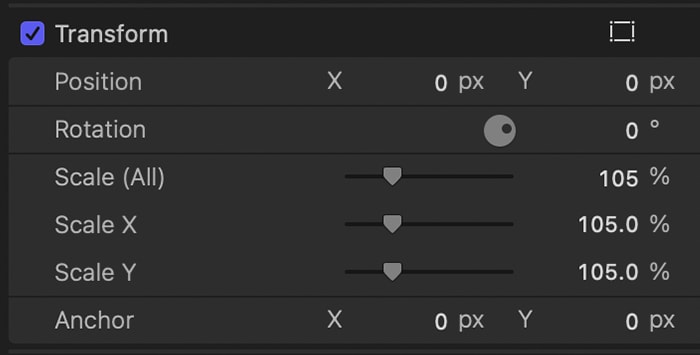
- Use the Transform controls in the video Inspector to adjust the video’s position, scale, and zoom the image.
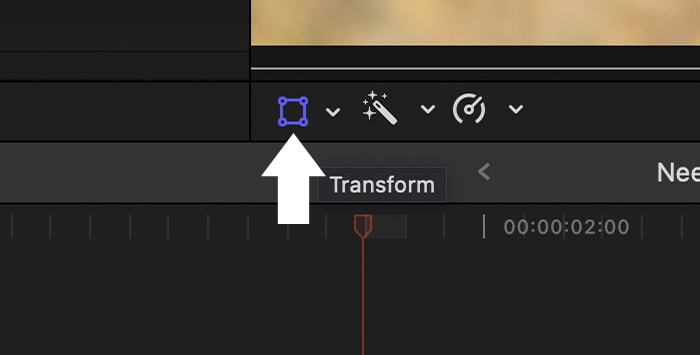
- Crop the video to remove the black bars. Select the clip and place the playhead over it to visualize it. Click the Transform icon on the bottom of the viewer and select Crop. Drag the corners to adjust the image, leaving the black bars outside the crop area.
- Adjust stabilization settings to make translation and rotation smooth, and scale to reduce the black bars in the result.
Final Words
Stabilization software is a good option when you don’t have the right equipment to shoot steady videos, and Final Cut Pro's stabilization features offer a great combination for stabilizing video footage. Besides stabilizing videos to fix footage, stabilization can also be used as a creative effect for your videos.
Good luck, and stay creative!
FAQ
Is Final Cut Pro's video stabilization any good?
Final Cut Pro's stabilization works best when using a camera with built-in stabilization, a tripod, or a gimbal to shoot and when there is little camera movement. The results can be sub-par with very shaky footage, and the stabilization in Final Cut Pro can leave many black bars, distortion, and blurriness.
A specialized stabilizer such as BCC Optical Stabilizer may be a better solution to improve your unsteady footage.