MAGIX VEGAS Pro (fka Sony Vegas Pro) is great video editing software for Windows, but it can look and feel complicated even to experienced users. It has many powerful tools, but finding the exact feature you're looking for is often challenging.
In today's tutorial, you'll learn how to merge clips in Sony Vegas (now known as MAGIX VEGAS). You can combine multiple clips in the timeline into a single video file, making them easy to edit in larger projects, or you can merge clips into one frame to create split-screen videos or for compositing. I'll show you how to do it with VEGAS Pro's built-in tools and with a Boris FX Continuum filter.
Let's dive in!
How to Merge Clips in Sony Vegas (Now MAGIX VEGAS)

We'll look at two methods to combine clips in Sony Vegas Pro: one to combine clips into a single clip to use as one, and the other to merge clips in a single frame using blend modes. Try using videos with the same format, frame rate, and resolution for best results.
Combine Clips Into a Single Clip
-
Step 1: Import Video Clips
Launch VEGAS Pro and import your video clips to merge. Go to the File menu and select Import, then Media.
Browse your computer folders to find the file you want to import into Vegas Pro. You can select multiple videos by pressing CTRL + Click to import all the clips you want to merge from the beginning.

-
Step 2: Arrange and Edit Clips
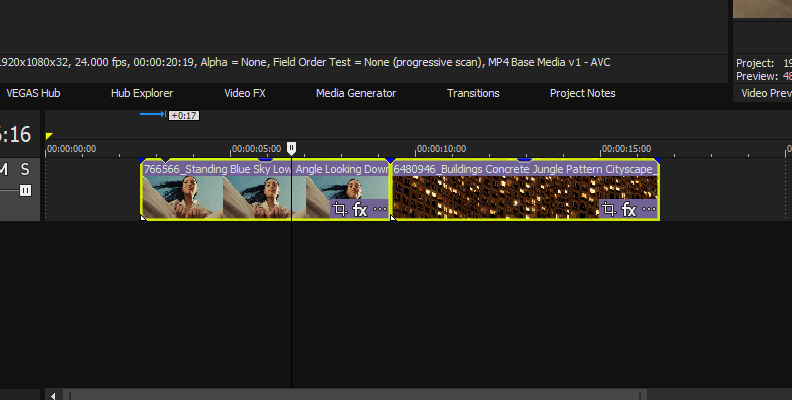
Drag the imported video clips from the project media window to the timeline. Arrange the clips in the timeline in the order you want them to play. Trim the clips and make the edits you need before merging them.
Place the two clips next to each other in the timeline, or join them together to create a crossfade between them. You can also add a custom transition. Just ensure there are no empty spaces between the clips you want to merge.

-
Step 3: Merge Clips in a New Track
Select the video clips to combine in the timeline. You can select multiple clips by pressing down the CTRL key while clicking.
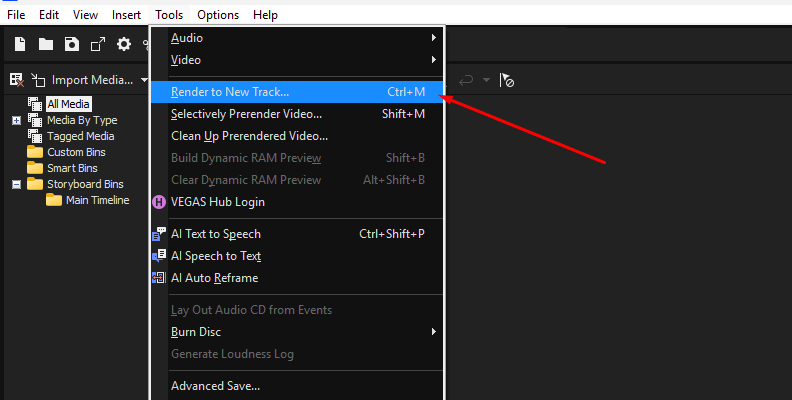
Go to the Tools menu, click "Render to New Track," and choose the location and name of the new rendered track. Click render and wait for the rendering process to conclude. Once it finishes, the new track will appear in the track list as a single clip.
-
Step 4: Merge Clips by Creating a Group
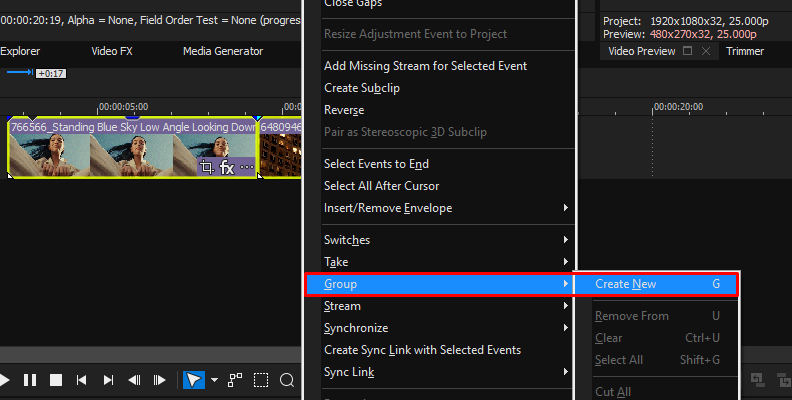
Another option is creating a Group. Select the clips you want to combine and right-click on any of the selected clips. Scroll down the drop-down menu to find Group > Create New. All the clips are merged now and can be arranged as a single clip in the timeline.
Now, you can continue editing the project and render the final video.
Merge Clips into One Frame
-
Step 1: Import Video Clips
Go to File and select Import > Media to import the video clips into your VEGAS Pro project. CTRL + Click all the video clips to select them and click Open.
-
Step 2: Arrange Videos
Drag the first video file to the timeline and the second to the track below the first one. Ensure you have the two video events, one above the other, and that they are the same length.

You can trim the video clips to match the duration. If you play the sequence now, you will only see the video on the top track, but we'll merge the two into one frame in the next step.
-
Step 3: Merge Clips With Compositing Mode
Select the upper track to merge the two clips into one frame, and click the hamburger menu (or three dots, depending on your version) on the track header. Then click Compositing Mode and choose a blend mode. Try a few blend modes and experiment with the track's opacity for a unique look.
-
Step 4: Merge Clips with Crop Effect
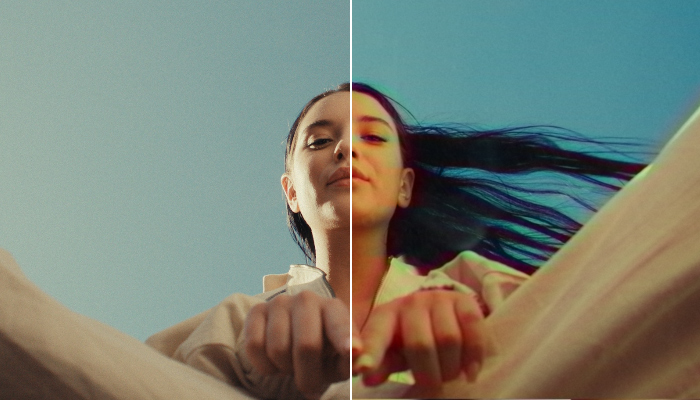
If you want to merge video clips so that all videos play on the same frame in split-screen mode, you'll need the Crop effect. Select the top video clip and browse for the Crop effect from the FX window. Drag and drop it into the top clip or double-click it to apply it to the selected clip.
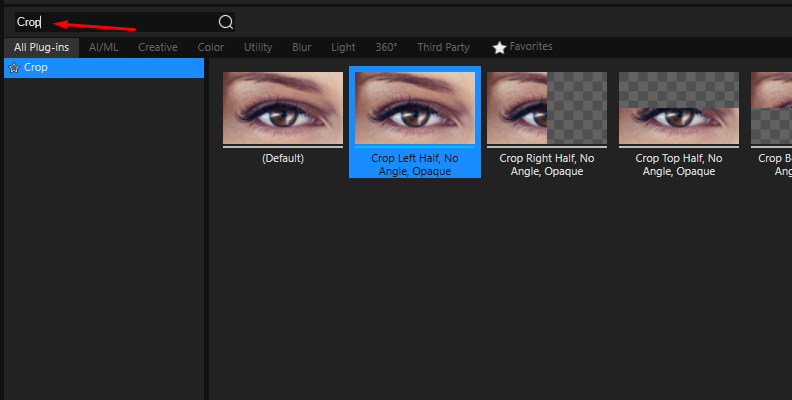
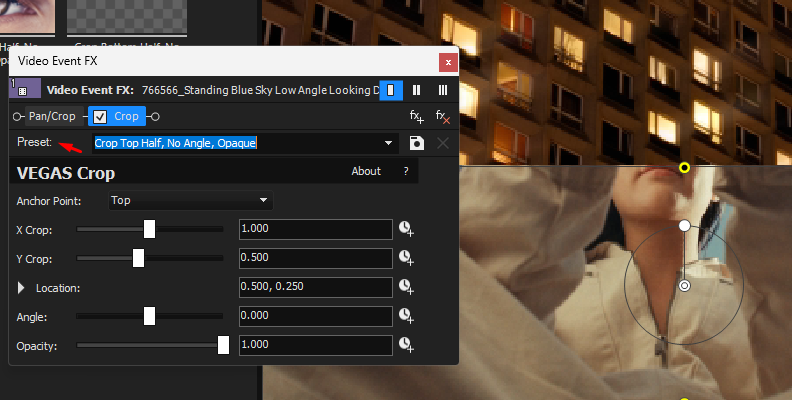
Now, just adjust the yellow dots in the preview window to crop the top video clip and reveal the bottom. You have a few presets ready to make vertical or horizontal split-screen videos.
Merge Two Clips into One in Sony Vegas (Now MAGIX VEGAS) with BCC+ Math Composite
For this next part of the tutorial, we'll use a Continuum filter. The BCC+ Math Composite filter helps you combine two clips in a single frame using blend modes to composite the background and foreground clips into a new video clip.
You'll require a Continuum license or the free trial before continuing. Ensure you have installed and updated Continuum before launching MAGIX VEGAS Pro (fka Sony Vegas Pro).

-
Step 1: Import Clips and Create a New Timeline
Launch Sony Vegas Pro and import the video clips you want to merge. Go to File > Import > Media and browse for your files on your computer.
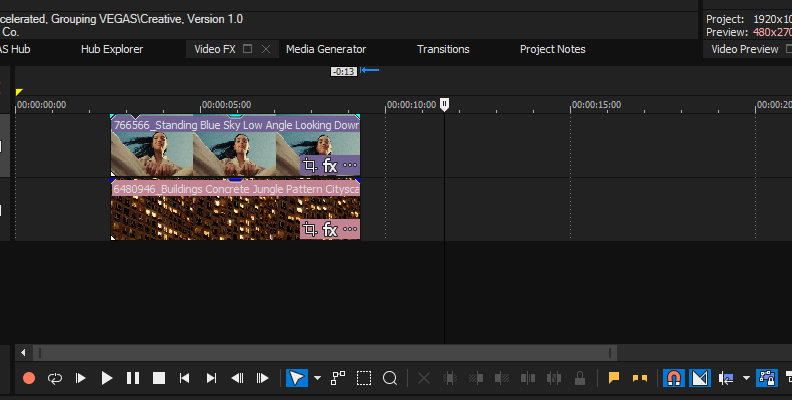
Arrange the two video clips on the timeline, deciding which video will be the background and foreground.
Remember to place one on top of the other in the timeline, with the background clip at the bottom and the foreground clip on top.
-
Step 2: Add the BCC+ Math Composite Effect
To apply the BCC+ Math Composite Effect in Sony Vegas Pro (now MAGIX VEGAS Pro), go to the track header "More" menu (burger menu or three points) on the top clip and click Composite Mode. Then, select the Custom Composite category. In the plug-in chooser window, browse for the BCC+ Math Composite plug-in and click OK. The plug-in will automatically use the track below the selected one as the background layer.
-
Step 3: BCC+ Math Composite Settings
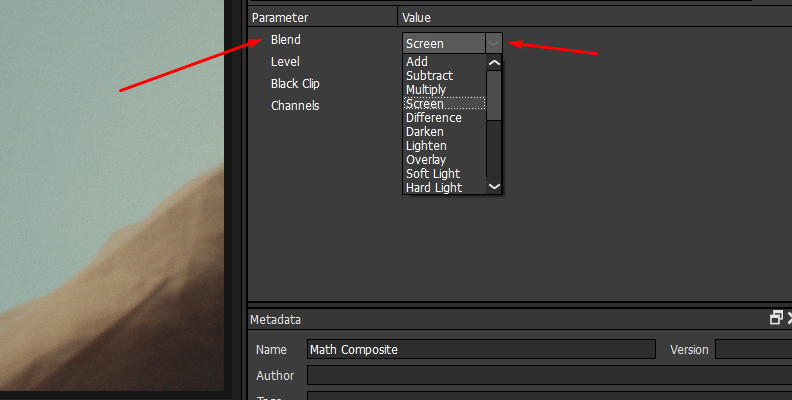
The BCC+ Math Composite settings are displayed in the Track Composite Mode window. To visualize each clip and the final result, you can alternate the View option between Output, Foreground, and Background.
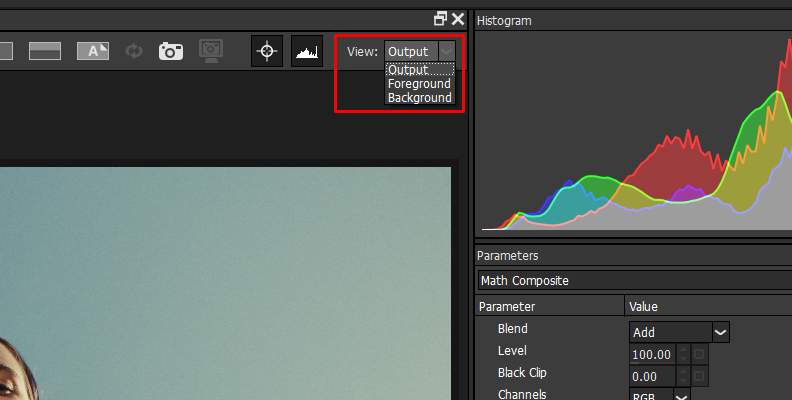
Click the Blend menu to choose a blend mode to composite and merge the two video clips. As you select the best blend mode, you can preview the chosen blend mode in the preview window. You can also create a loop region to play the video and see how it changes.
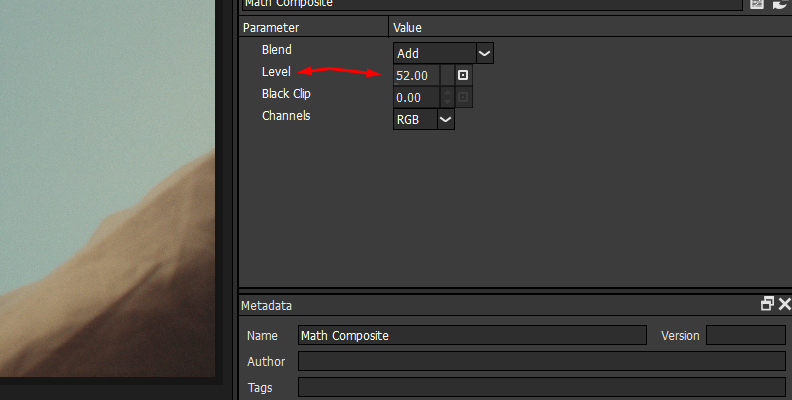
The Level slider adjusts the level of visibility of the foreground clip. This is independent of the Level track slider. You can experiment by playing with both to achieve a better look.
Adjust the Black Clip slider to darken the blacks in the image. This setting helps with images where the blacks are not completely black and reduces the milky black effect.
Experiment with the blend modes and adjust the track's level and opacity settings. Enable the compare mode to see the before and after, and modify the settings until your clips merge. You can also add masks to target a specific part of the image to apply the BCC+ Math Composite filter.

Final Words
Continuum BCC+ Match Composite offers an easy way to merge clips with creative options and fine-tuning settings that work for multiple videos and scenes. With MAGIX VEGAS Pro (fka Sony Vegas Pro) and Continuum, you can elevate your video editing. Together, they offer compositing and clip combination and a wide array of tools for video effects, filters, and transitions to improve images, enhance videos, and incorporate impressive motion graphics into your video projects.
Have fun, and stay creative!