Loop animations are very popular these days thanks to their repetitive and predictable patterns. From visuals to storytelling, a simple loop animation can affect how we experience a video sequence, a commercial, or a webpage.
In this blog post, you'll learn what an animation loop is, tips for creating the perfect loop, and how to loop animation using the newest version of the Particle Illusion plug-in inside Continuum 2025.
Let’s dive in!
What Is Loop Animation?
A loop animation is a sequence of frames that repeats endlessly. It seamlessly connects the last frame with the first one to play, repeating itself infinitely without an apparent beginning or end to create the illusion of motion.
One of the most important things when creating a perfect loop animation is ensuring that the transition from the last frame to the beginning is as smooth as possible. This way, the animation appears continuous and more natural, avoiding jumps when the animation sequence starts again.
When the starting and ending frames differ significantly, the loop animation sequence may appear unnatural and even robotic unless that’s the type of animation you intend to create. Many 2D and 3D animators often experiment with this to create unique features for character animation.
The most common example of an animation loop is a repetitive action, such as a run or walk cycle. However, a loop animation can also be used in motion graphics for loading screens, representing time, or simply for visual appeal. The animator or graphic designer creates a few frames of the element design and then repeats the animation sequence. Reverse animation is frequently used for smooth transitions.
For a perfect loop animation, keep the loop minimalistic and short for smoother transitions. However, with more complex animations, like a character or realistic element, you can extend the loop a bit longer to add variation. An animation without a seamless loop can be easily detected due to flickering when it jumps back to the beginning, which our eyes often perceive as odd.
Loop animation is not restricted to the film and video games industry. There are many more opportunities and reasons to create an animation loop for your videos:
-
Character movement
-
Add motion
-
Add the sense of time passing
-
Support or draw attention to a specific element on the screen
-
Background visuals
-
User experience
-
GIF creation
Loop Animation with Continuum Particle Illusion
Particle Illusion is a plug-in inside Boris FX Continuum and a standalone application that instantly creates motion graphics elements with 3D particle animations. It allows you to add realistic particle effects to your videos for visual effects, backgrounds, titles, lower thirds, and more.
The latest Continuum and Particle Illusion update added a new repeat animation feature, the option to copy and paste gradients and sprites, and over ten curated presets. In this last section, I'll show you how to use this timesaving loop animation feature to create particle effects and loop the animation to extend the simulation, which is now easier than ever.
-
Step 1: Get Continuum
First, let's download and install Continuum for your favorite host application if you don't already have it. If you have Continuum installed, ensure you're in the 2025 version.
Go to the Continuum web and click Download Free Trial. It will download the Boris FX Hub, the application for managing, downloading, and updating your owned products. Find Continuum and select your host to begin the installation.
Continuum is supported in Adobe Premiere Pro, After Effects, DaVinci Resolve, VEGAS Pro, and more.
For this specific example, we'll be using Adobe Premiere Pro.
-
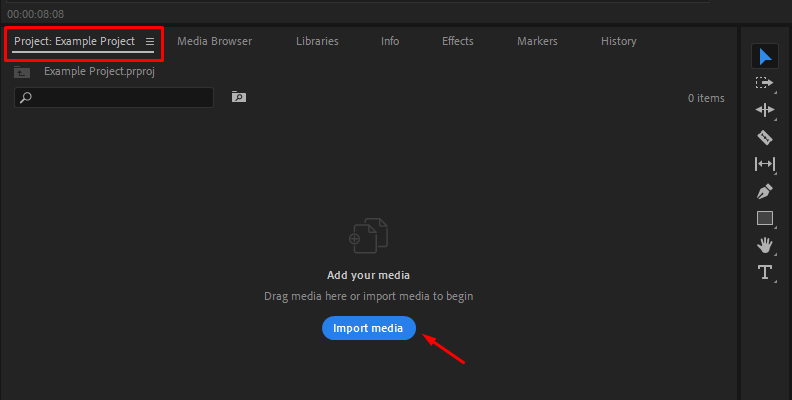
Step 2: Set Up Your Project
Launch your video editing software, open or create a new project, and import your videos and other media. Add your videos to the timeline to create a sequence and do all necessary editing before applying the Particle Illusion plug-in.
-
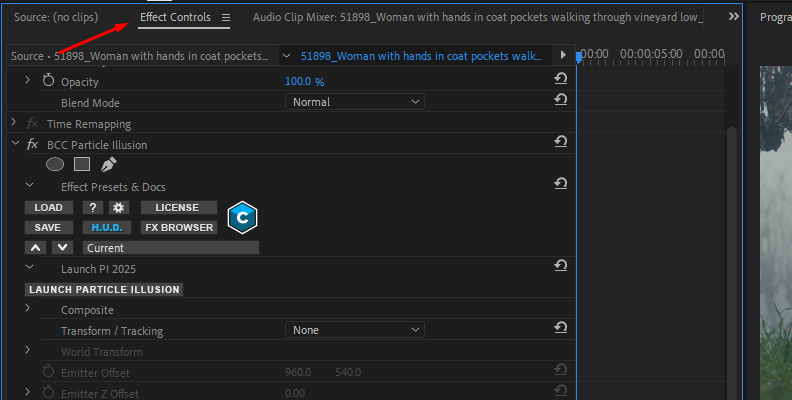
Step 3: Add BCC Particle Illusion
Go to your host’s effects library and type BCC Particle Illusion in the search box. You can also browse it through your Continuum effects in the BCC Particles category. Drag and drop the BCC Particle Illusion effect to the clip in the timeline where you want to add the particles.
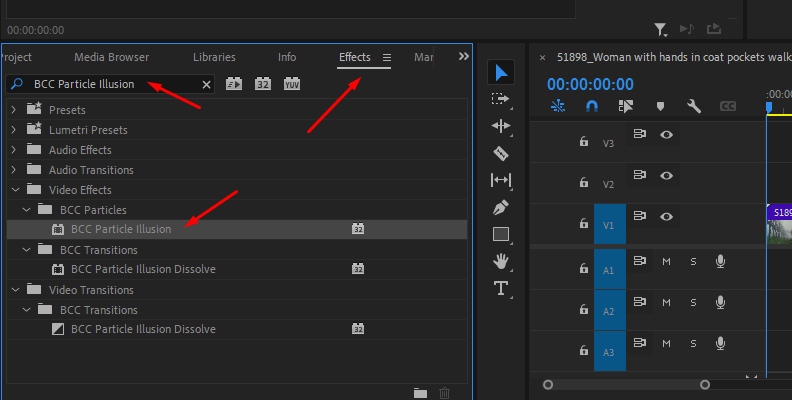
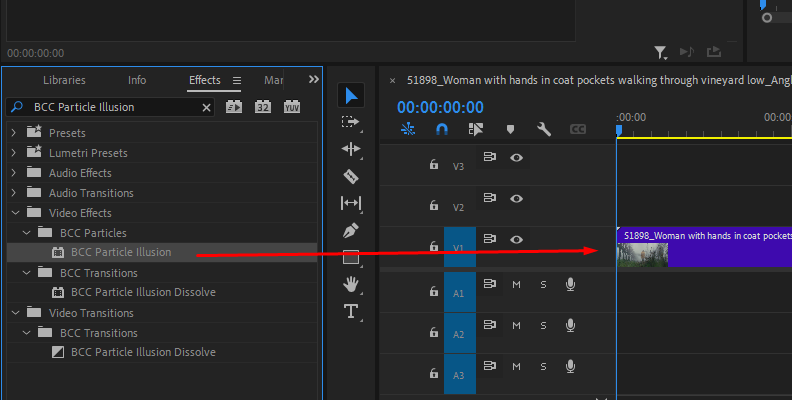
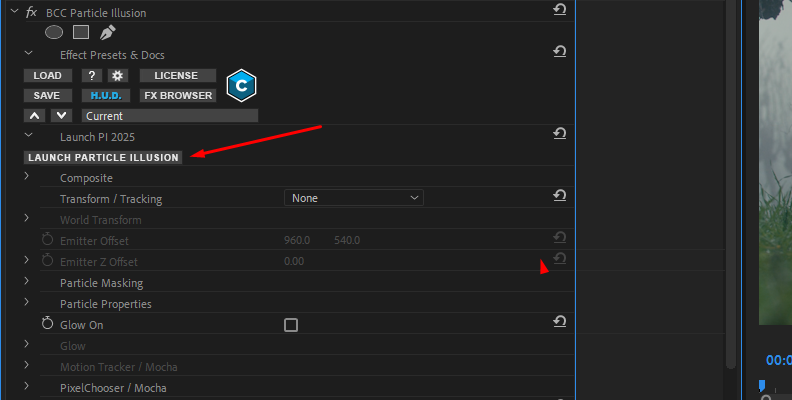
Go to the effect settings and click “Launch PI” to open the Particle Illusions user interface.
-
Step 4: Add a Particle Emitter
Once in the Particle Illusion interface, I recommend starting with a preset. Use the search libraries box in the Emmiter Library Browser to search for a particle using keywords such as explosion, burst, fire, etc. Click on one preset to preview it on the Emitter Preview above.
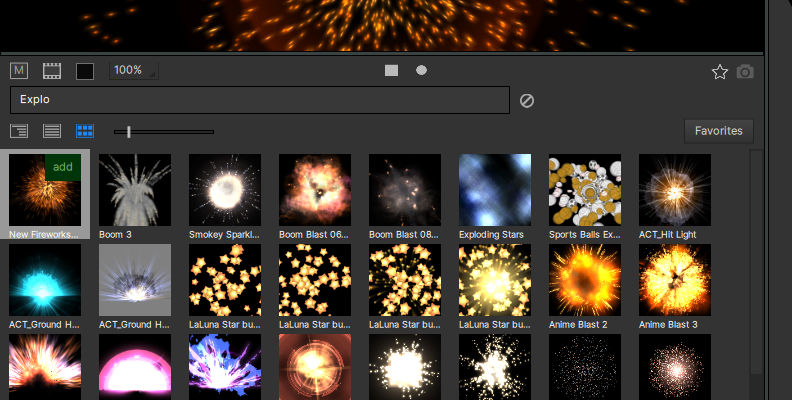
Add the preset by clicking the “add” box that appears when you put the mouse over it.
-
Step 5: Create a Loop Animation
You can create a loop animation for any keyframe parameter. Depending on the emitter, you can also animate position or any over-time parameter.
Let’s work with a fireworks preset. Fireworks usually have one burst of explosion, and then the animation stops. You can loop the particles to start again with another fireworks burst once it is over or keep it longer.
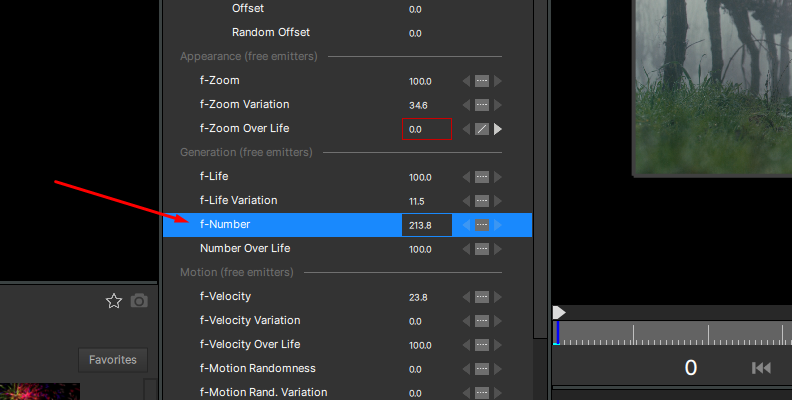
Select a fireworks preset for this example. The parameter you want to loop is the f-number in the Generation parameter group. Right-click the f-number parameter and select Repeat Parameter Animation from the dropdown menu.
On this window, you have three main settings to adjust.
-
Total Animation Cycles: You can set the number of times the animation loop repeats. You can only add up to 10 cycles per instance, but you can right-click the parameter and select the Repeat Parameter Animation feature to add more cycles and create a realistic animation loop. Extending the cycles will keep our fireworks emitter going longer.
-
Frames Between Cycles: This setting allows you to add a delay between each loop by adding extra frames between cycles.
-
The cycle Scale Factor allows you to add a scale factor to each cycle to add variation to each animation loop cycle.
-
The “Hold Last Key Value Between Cycles” option lets you hold the last keyframe before the next loop. Continuing with our fireworks emitter example you can check this option if you want the burst to die before exploding again.
-
You can check the Reverse Alternate Cycles to flip the animation loop, which is helpful when looping position paths. For example, you can use this to animate a sparkling emitter to move across the screen back and forth or around a title.
Once you create a loop animation, you can manually customize the keys in the Graph view below the Stage Window. Experiment with this new feature using different emitters to create extraordinary particles with loop animation. Use the Repeat Animation feature multiple times to create a mind-blowing loop animation for your particles.
-
Final Words
Particle Illusion is a powerful tool for creating 3D particles for your videos and motion graphics. With the new Repeat Animation feature, you can create one animation loop in seconds and make it as complex and longer as you want with just a few clicks to enhance your video projects and visual effects.
If you’re new to VFX and Continuum, you can Download a free trial of Continuum 2025 to experiment with BCC Particle Illusion and over 300 effects.
Good Luck!