The kaleidoscope effect is a great option to create a colorful and shiny transition or background pattern for your videos. In this tutorial, you'll learn how to make one in Adobe After Effects using various tools, including a dedicated tool for kaleidoscope effects from Boris FX Continuum.
Let’s dive in!
What is Kaleidoscope Effect?
A kaleidoscope is an optical device with two mirrors set at different angles, so when you look through it, the image appears as a symmetrical pattern. Some of these devices have colored material that can be rotated, creating a colorful psychedelic pattern. This effect is what we call a kaleidoscope effect, and it can be replicated in post-production using software such as Adobe After Effects.
Create a Kaleidoscope Effect (After Effects)
To create the kaleidoscope effect, we will use the Mirror effect in Adobe After Effects.

-
Step 1: Set Up the Composition
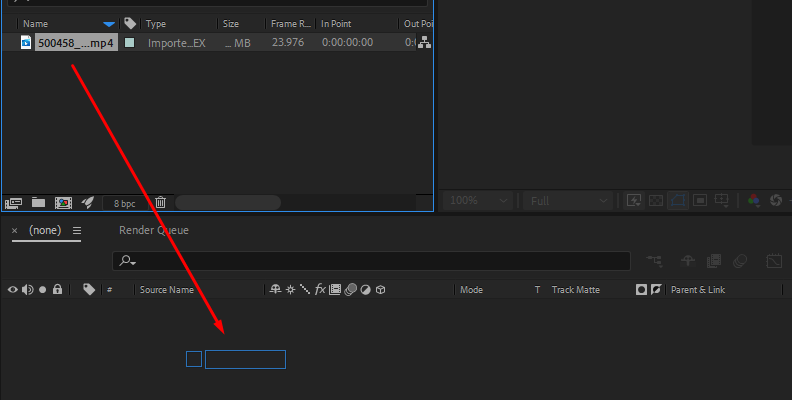
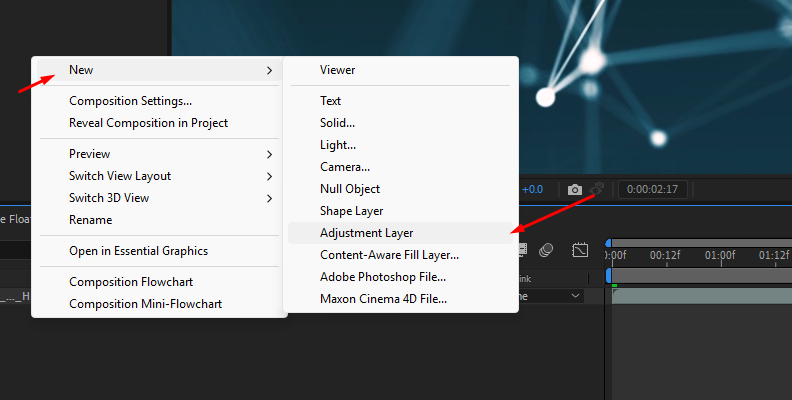
Create a new composition with your preferred settings for the final video. Import the video or images you want to convert into a kaleidoscope effect from File > Import > File and drag the video clip to the timeline. Add a new adjustment layer and arrange the layers in the timeline.
-
Step 2: Add the Mirror Effect
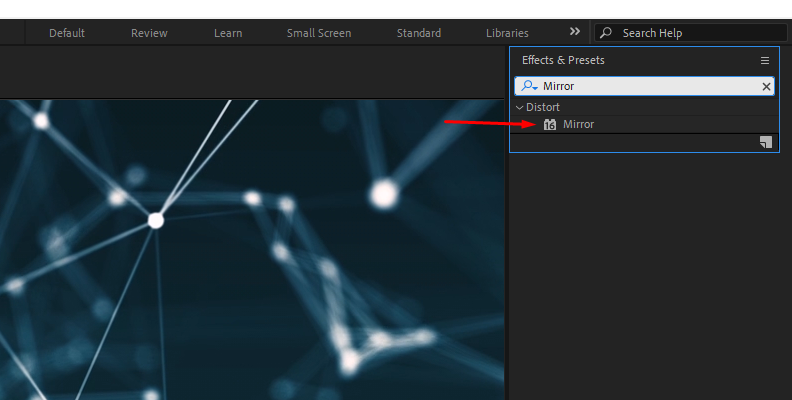
Select the Adjustment layer and then go to the Effects & Presets to search for the Mirror effect. Use the search box to type "mirror," and once you find the effect, click and drag it to the adjustment layer.
-
Step 3: Mirror Adjustments
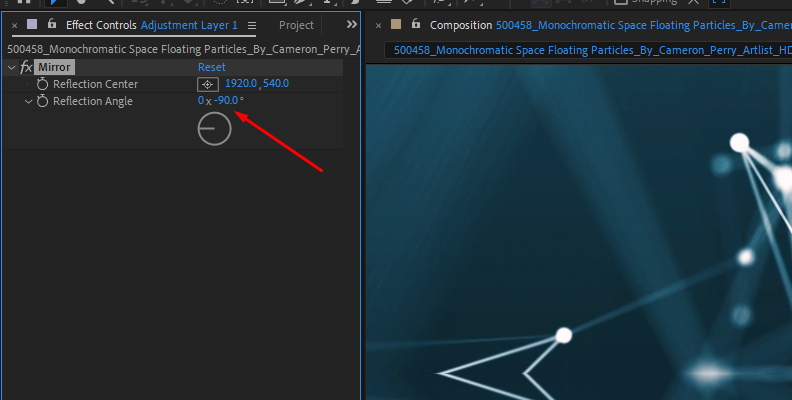
To create the kaleidoscope effect, we’ll need to add multiple instances of the mirror effect with different settings for each one. For the first mirror effect, set the Reflection Angle to -90 degrees to flip the image.
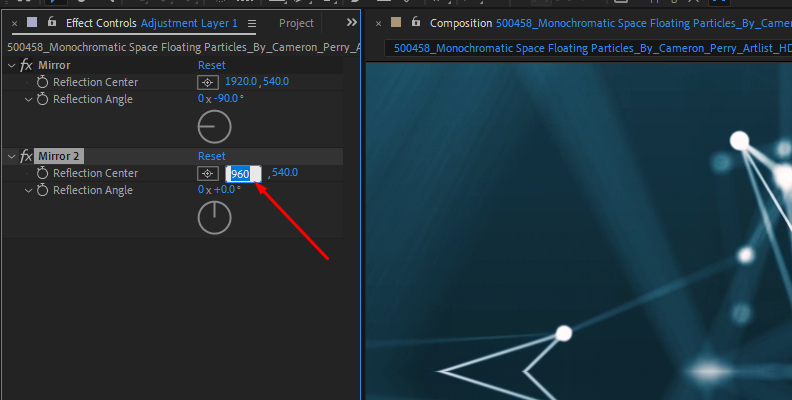
Now, add a second mirror effect and adjust the X value of the Reflection Center (the first set of values) to a lower number until you have a symmetrical figure in the middle.
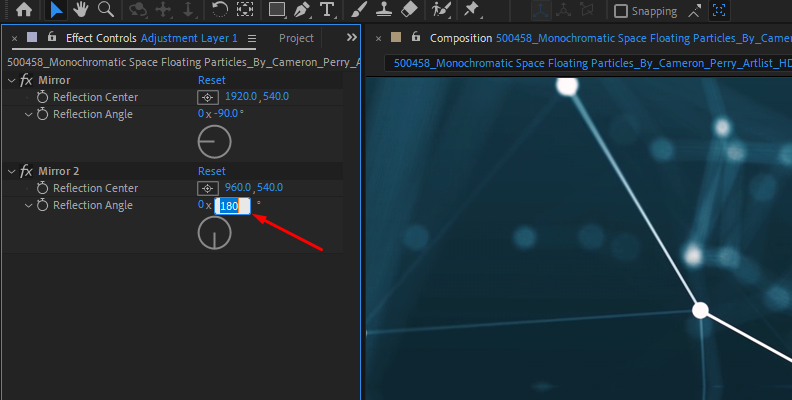
Then, change the Reflection Angle to 180 degrees and continue modifying the Reflection Center value until you see the reflection on the other side of the canvas.
Play the sequence to see how it looks. Play with the Mirror effect settings and add a third or more instances of the mirror effect to achieve a more complex kaleidoscope pattern.

Create a Kaleidoscope Effect in After Effects with BCC Kaleida Dissolve
For the next part of this tutorial, we’ll use the BCC Kaleida Dissolve filter from Boris FX Continuum.
BCC Kaleida Dissolve is a transition effect that allows you to craft a kaleidoscope effect for your videos in Adobe After Effects.
You can use it as a filter effect to create backgrounds, visuals, or transitions between video clips. It is more customizable than building the effect with the Adobe Stock After Effects Mirror effect.
-
Step 1: Set Up a New Composition
Create a new composition and import the video. Then, drag it to the timeline and arrange the layers if you’re using multiple video clips.

-
Step 2: Apply BCC Kaleida Dissolve
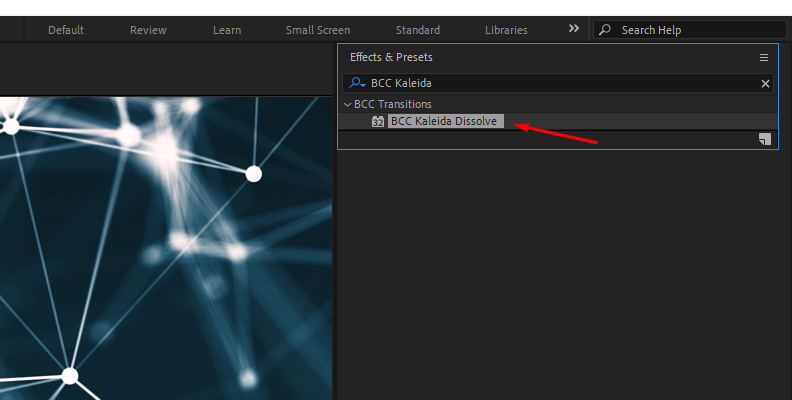
Go to the Effects & Presets panel and search for "BCC Kaleida Dissolve" and drag it to the video clip layer. When you apply the effect in After Effects, you'll notice the on-screen controls you can tweak. First, let's look at the presets.
-
Step 3: BCC Kaleida Dissolve Presets Panel
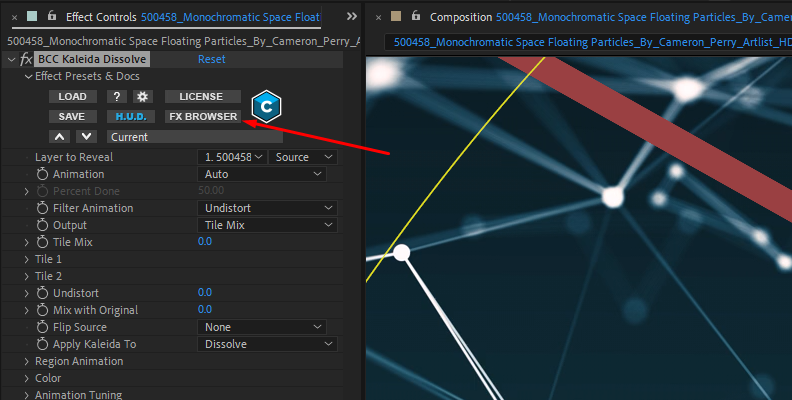
In the Effects panel, click the FX Browser button to launch the presets library.
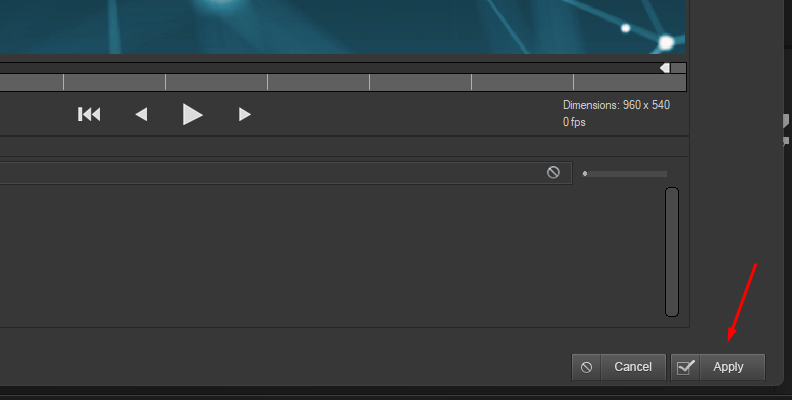
There you can select a kaleidoscope pattern that you like. You can preview them by clicking on one and pressing play in the preview window.
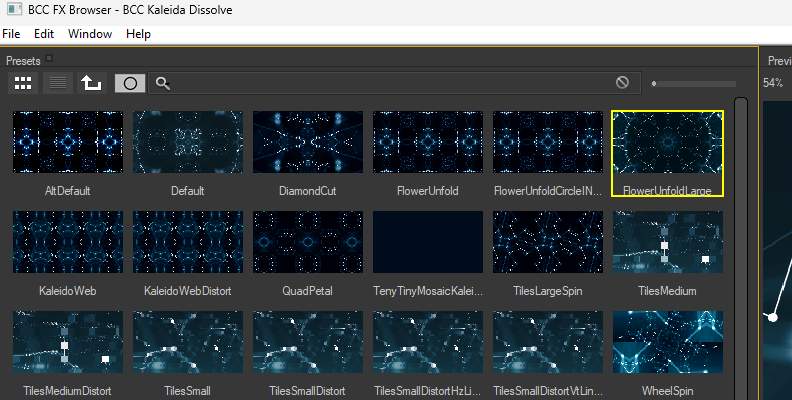
Click Apply to select a preset or modify it, or cancel to return and create the kaleidoscope effect from scratch.
-
Step 4: BCC Kaleida Dissolve Animation Adjustments
To add the filter as a style filter, use the "Percent Done" option under the Animation menu.
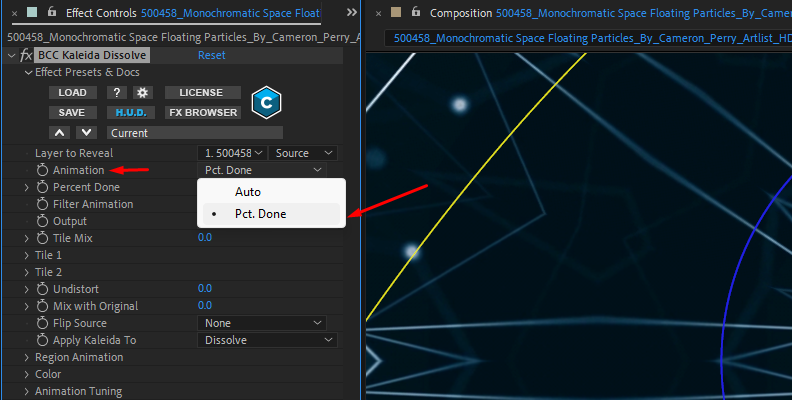
Auto is a better option when you want to use it as a transition to auto-animate the kaleidoscope effect. When you apply it as a filter using the Auto option, it creates a kaleidoscope effect with a gradual animation that lasts the length of the video.
-
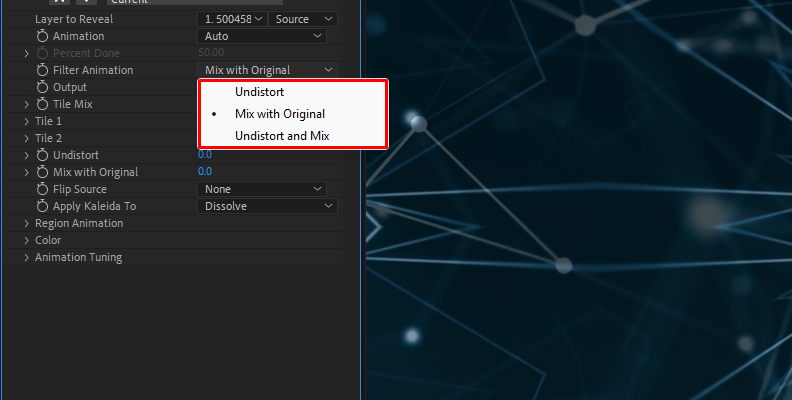
Step 5: Filter Animation Adjustments
The next step in configuration is to determine how the kaleidoscope effect animates during the transition. You have three options to choose from.
-
“Undistort” animates by increasing the intensity of the kaleidoscope effect and the point where the transition between clips occurs. When used in a single video, the video will transition from normal to the kaleidoscope filter and then back to the original video gradually.
-
“Mix With Original” adds the kaleidoscope effect to the original video, fading in and out.
-
“Undistort and Mix” combines the other two options by distorting the original footage simultaneously with creating the kaleidoscope pattern over the video.
-
-
Step 6: Tiles Adjustments
You can customize the pattern of the kaleidoscope effect with the Tile 1 and Tile 2 subgroups. To see the changes, you can alter the view by changing the Output menu to Tile 1 and Tile 2, and the mix.
You can adjust the center, size, and rotation of each tile, as well as change the pattern with the style menu. Experiment by combining different styles to create a unique kaleidoscope effect.
-
Step 7: Fine-Tune the Kaleidoscope Effect
By now, you should have the pattern and animation of the kaleidoscope effect done. However, the BCC Kaleida Dissolve offers more adjustments.
The following parameters are others you can experiment with to modify the output of the kaleidoscope effect.
-
“Undistort” to ease the distortion during the transition.
-
“Flip Source” to flip the image of the source video vertically, horizontally, both, or none.
-
"Region Animation" to set the direction of the transition. This option enables the Animation and Region Type parameters, as well as Direction, Softness, and Center Point.
-
The “Color” parameter group offers settings to adjust the brightness, contrast, and saturation of the transition’s peak point.
-
The "Animation Tuning" settings are the on-screen controls you see in the viewer, which allow you to adjust the overall timing of the transition. It's easier to change them using the curve from the on-screen controls.

-
Final Words
Creating a kaleidoscope effect from scratch with Adobe After Effects' Mirror effect can be time-consuming, but if you take the time to fine-tune its settings, you can get a good kaleidoscope effect for your videos.
If you want more customization and the option to create the effect more quickly, BCC Kaleida Dissolve is here to save the day. Get your copy of Continuum and take your workflow to the next level!
FAQ
How to Use Kaleidoscope Effect in Projects?
You can use the kaleidoscope effect for transitions between clips, for music videos, animated backgrounds, and still images. The BCC Kaleida Dissolve gives you the tools to create both transitions and effects for videos and pictures.