Have you ever found yourself trying to blend images so you can get the colors of one into another, only to end up with unrealistic colors? Color matching is a technique that every photo editor should know how to do, but to do it right, you'll need the perfect tools for the job.
In this tutorial, you'll learn how to color-match photos in Photoshop and the common mistakes to avoid in your future projects.
Let’s dive in!
What is Color Matching in Photoshop?

Color Match is a technique used in digital photo editing to match the colors of a source image or layer to those of a target image, object, or layer, ensuring a series of photos remains consistent and aligned with a specific style or emotion.
The benefits of matching colors in Photoshop include creating a cohesive composite, color correction, achieving uniform colors across an image or a series of photos, and altering colors of objects for branding or marketing purposes in interior design, fashion, and other graphic design projects.
How to Color Match in Photoshop: Step-by-Step Guide
Adobe Photoshop features a Match Color tool that allows you to match the color from a source image to another image. Let’s learn how to use this feature to color match images.
-
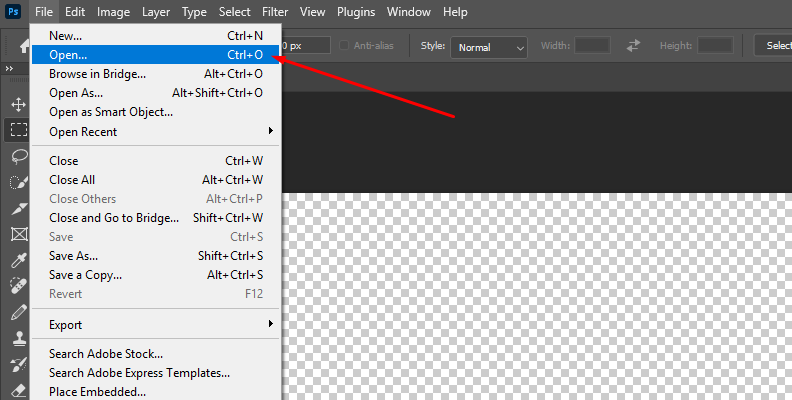
Step 1: Import Your Photos
Launch Photoshop and open the images you want to color match. To match colors between two images, you'll need to import them into separate layers.
-
Step 2: Make an Object Selection
To match the color of two different objects or regions in the same image, you need to make a selection first. A quick way to do it is to use the Object Selection Tool.
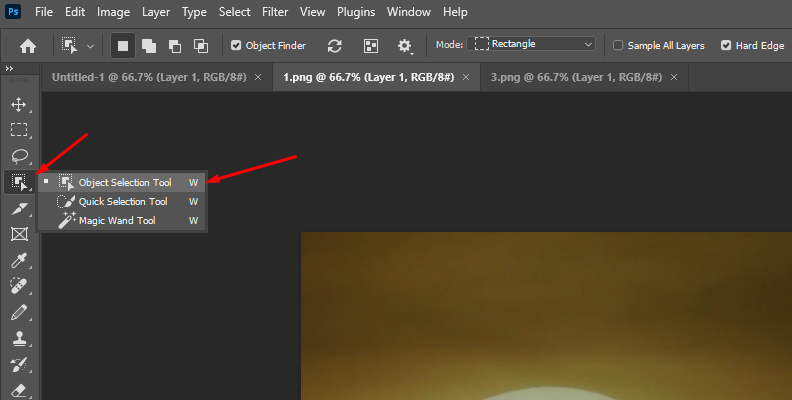
Select the tool and hover the mouse over the object you want to color match. Click it and create a new layer from the selection.

-
Step 3: Match Color Feature
Select the target image to color match, and then navigate to Image > Adjustments > Match Color.
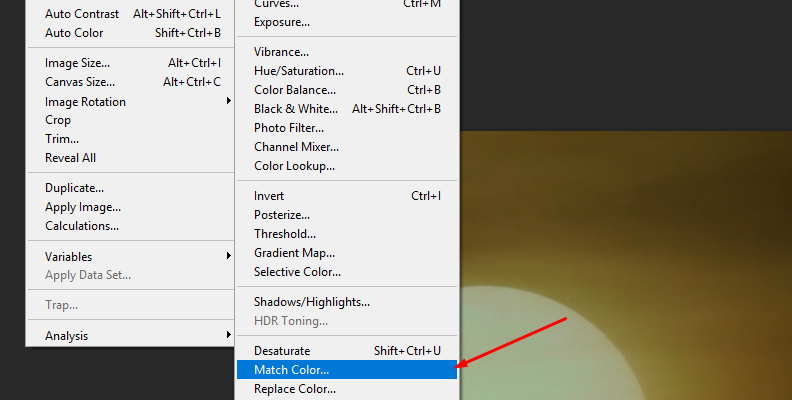
A window will pop up with all the match color settings.
If you're matching colors from two different regions of the same image, ensure that you select the target layer with the selection to apply the Match Color tool.
-
Step 4: Setting Image Statistics
First, go to the Image Statistics section of the Match Color dialog box and select the source image, which is the image from which you’re taking the colors for matching color, from the Source menu.
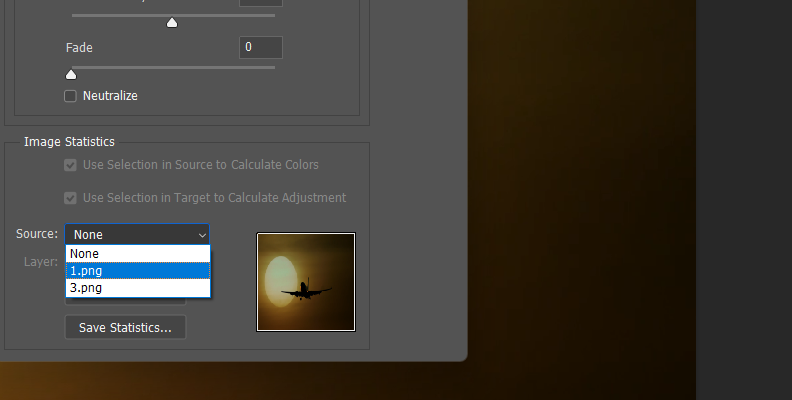
For a color match in the same image, ensure that the source image selected in the Source menu and your target image are the same. Then, use the Layer menu to choose the source layer.
If you made a selection in your images, make sure that you leave the "Use Selection in Source/Target to calculate Colors/Adjustments" options selected. When enabled, the Match Color tool uses the selection in the source image to estimate the colors to match and the selection in the target image or layer to compute the color adjustments.
-
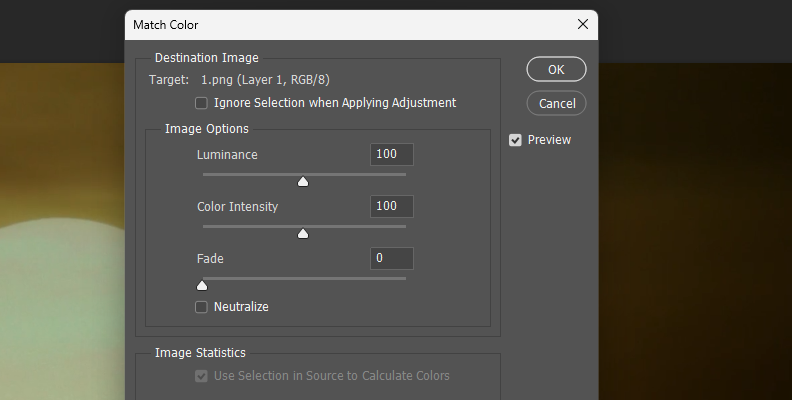
Step 5: Match Color Settings
Before adjusting the Image options, look at the Destination Image at the top of the Match Color dialog box. If you have a selection in the target image, leave the checkbox unchecked to use the selection in the target image to apply the match color.
Now, go to the Image Options and adjust the Luminance slider to change the brightness of colors, use the Color Intensity slider to modify color saturation, and move the Fade slider to control how much of the adjustment affects the target image. Check the Neutralize box to remove any color cast in the target image.
Continue readjusting the settings and ensure that the Preview box is enabled, allowing you to view the changes.
Click OK to apply the changes and add other tools if needed, such as adjustment layers to fine-tune the hue and saturation, curves, and blend modes of the final image.
How to Color Match in Photoshop with Optics: Color, Film Lab, Looks
Optics is a Boris FX plug-in for Photoshop and Lightroom, also available as a standalone photo editing tool. It allows you to create cinematic images, enhance pictures with special effects, film stock filters, particles, and more.
For this part of the tutorial, you’ll use Optics as a plug-in inside Adobe Photoshop. You can follow the tutorial with the Optics free trial.
-
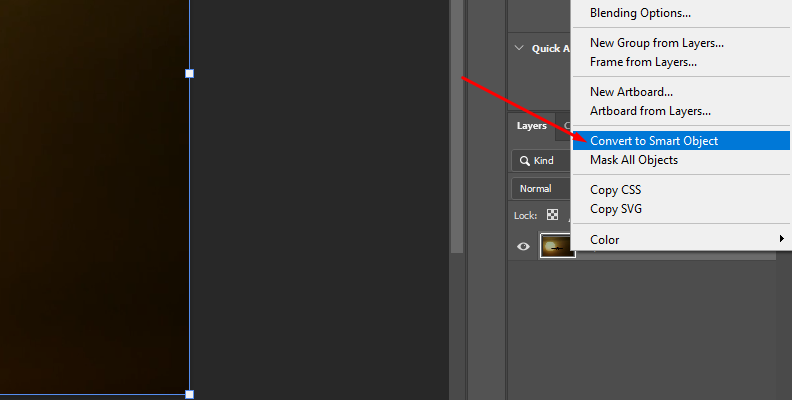
Step 1: Import Image
Open the image you want to color match in Photoshop and convert the layer into a smart object. To do so, right-click the image layer and select “Convert to Smart Object.” You can duplicate the image before converting it to a smart object to work on a duplicate image if you want to preserve the source image intact.
-
Step 2: Apply Optics as a Filter
Click the layer where you want to apply Optics and navigate to the Filter menu. Then find the Boris FX category and select Optics to apply it to the selected layer.

The Optics user interface will launch immediately, bringing the layer to its workspace, ready for work.
Make sure you apply the Optics filter to the target image.
-
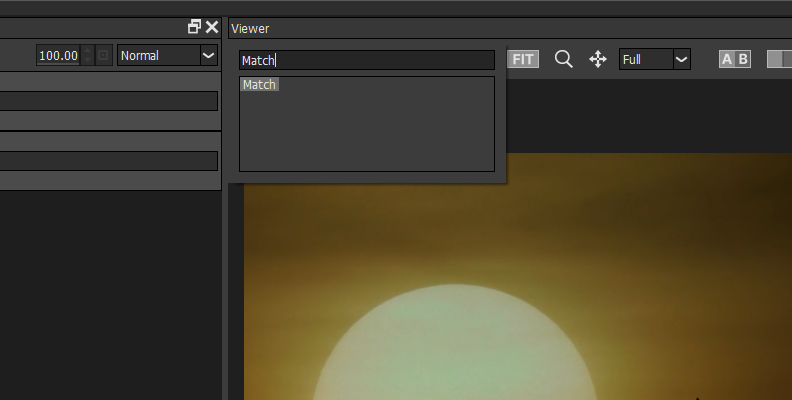
Step 3: Add the Match Filter
The first filter to use will be the Match filter.
Browse the Match filter in the Color category of the filter library below the preview window. Once you find it, click on it to apply it to the currently selected layer.
-
Step 4: Color Match Settings
To edit the filter, go to the Parameters section on the right side of the screen. There are three main settings to configure.
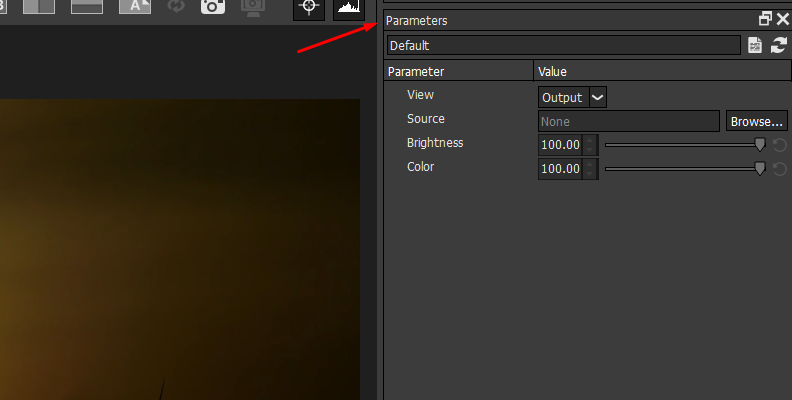
First, click the Browse button on the source settings to locate the source image for the color match process. The filter will analyze the brightness and color of the source image and apply it to the target image.
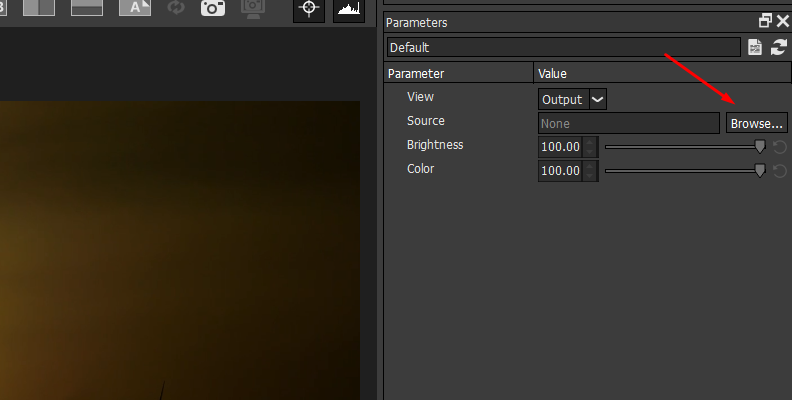
Next, adjust the Brightness and Color settings to match the brightness and color in the target image. Adjust the values as needed to achieve the desired look.
-
Step 5: Fine-Tune with Film Lab and Color Filters
You can fine-tune the color match process with a layer mask and other filters.
-
Add a layer mask to select regions of the target image to apply the Match filter adjustments and limit it to those areas. Click the Mask icon and select a mask type from the dropdown menu, then draw the masks around the regions of the image.
-
The Film Lab category features filters that add unique colors to your photos. The Looks filter is a great option for simulating film stocks, diffusion, color gradients, gels, and optical lab processes, such as bleach bypass.
-
Under the Color category, you’ll find tools for color correction, curves, and adjusting contrast, saturation, and tones.
-
Common Color Matching Mistakes to Avoid
Working with color match processes, as with any other tool, can be tricky. It's essential to understand the most common mistakes and how to avoid them to enhance your photos and experience with color matching techniques.
-
Ignoring Color Theory
You don't have to be an expert, but you should know at least the basics of color theory and how colors interact with each other. Take the time to learn color theory; it will simplify your work, not just for color matching, but also for various processes such as color correction.
-
Over-Saturating Colors
It's easy to go to extremes with color intensity and saturation when trying to match color, and the result can be unrealistic and overwhelming images. Avoid this mistake by making subtle adjustments. You can always go back and increase the color intensity slightly.
-
Neglecting White Balance
Ignoring white balance before starting color match or any color processing can lead to unwanted color tints (especially skin tones) across the image. Before beginning any color processing, it is advisable to correct the white balance.
-
Not Using Monitor Calibration
Another common mistake is editing on uncalibrated monitors or failing to test colors across different monitors. To avoid this mistake, calibrate your monitor periodically or test your photos on other screens to ensure accurate color representation.
-
Choosing the Wrong Color Mode
Working with digital or printed images requires using the right color mode in Photoshop. However, Match Color may not work precisely when editing in CMYK mode due to the limited color range. In contrast, RGB mode is the primary color mode for digital images, and color matching works best in this mode. However, remember to convert to CMYK for printing projects and soft-proof the colors.
-
Not Fine-Tuning Images
Another common mistake is leaving the Match Color tool in Photoshop or other color match filters as they are. Yes, they can provide a good starting point, but to create professional photos, you must ensure the best result possible, and that includes fine-tuning the image with adjustment layers to adjust luminance, color saturation, hue, and the curves tool.
Final Words
Developing your editing skills with color matching professionally requires you to take the time to learn about color theory, undertones, and how to work with adjustment layers, as well as color processing and tools. Today, you have learned how to color match in Photoshop with two easy tools that can improve your color match workflow in Photoshop.
FAQ
What is the Shortcut for Match Color?
In Photoshop, you can access the Match Color using the keyboard shortcut CTRL+ALT+Shift+L on Windows or Command+Option+Shift+L on Mac, instead of going through the Image menu.
Is Match Color in Photoshop Really Accurate?
It can provide an effective color match between images and layers. However, accuracy depends on other factors, such as the quality of the source image and your monitor calibration. Match Color is designed to harmonize colors rather than match individual pixels, so it's best used in combination with other tools, such as curves, hue/saturation, and selective color, for better accuracy.