


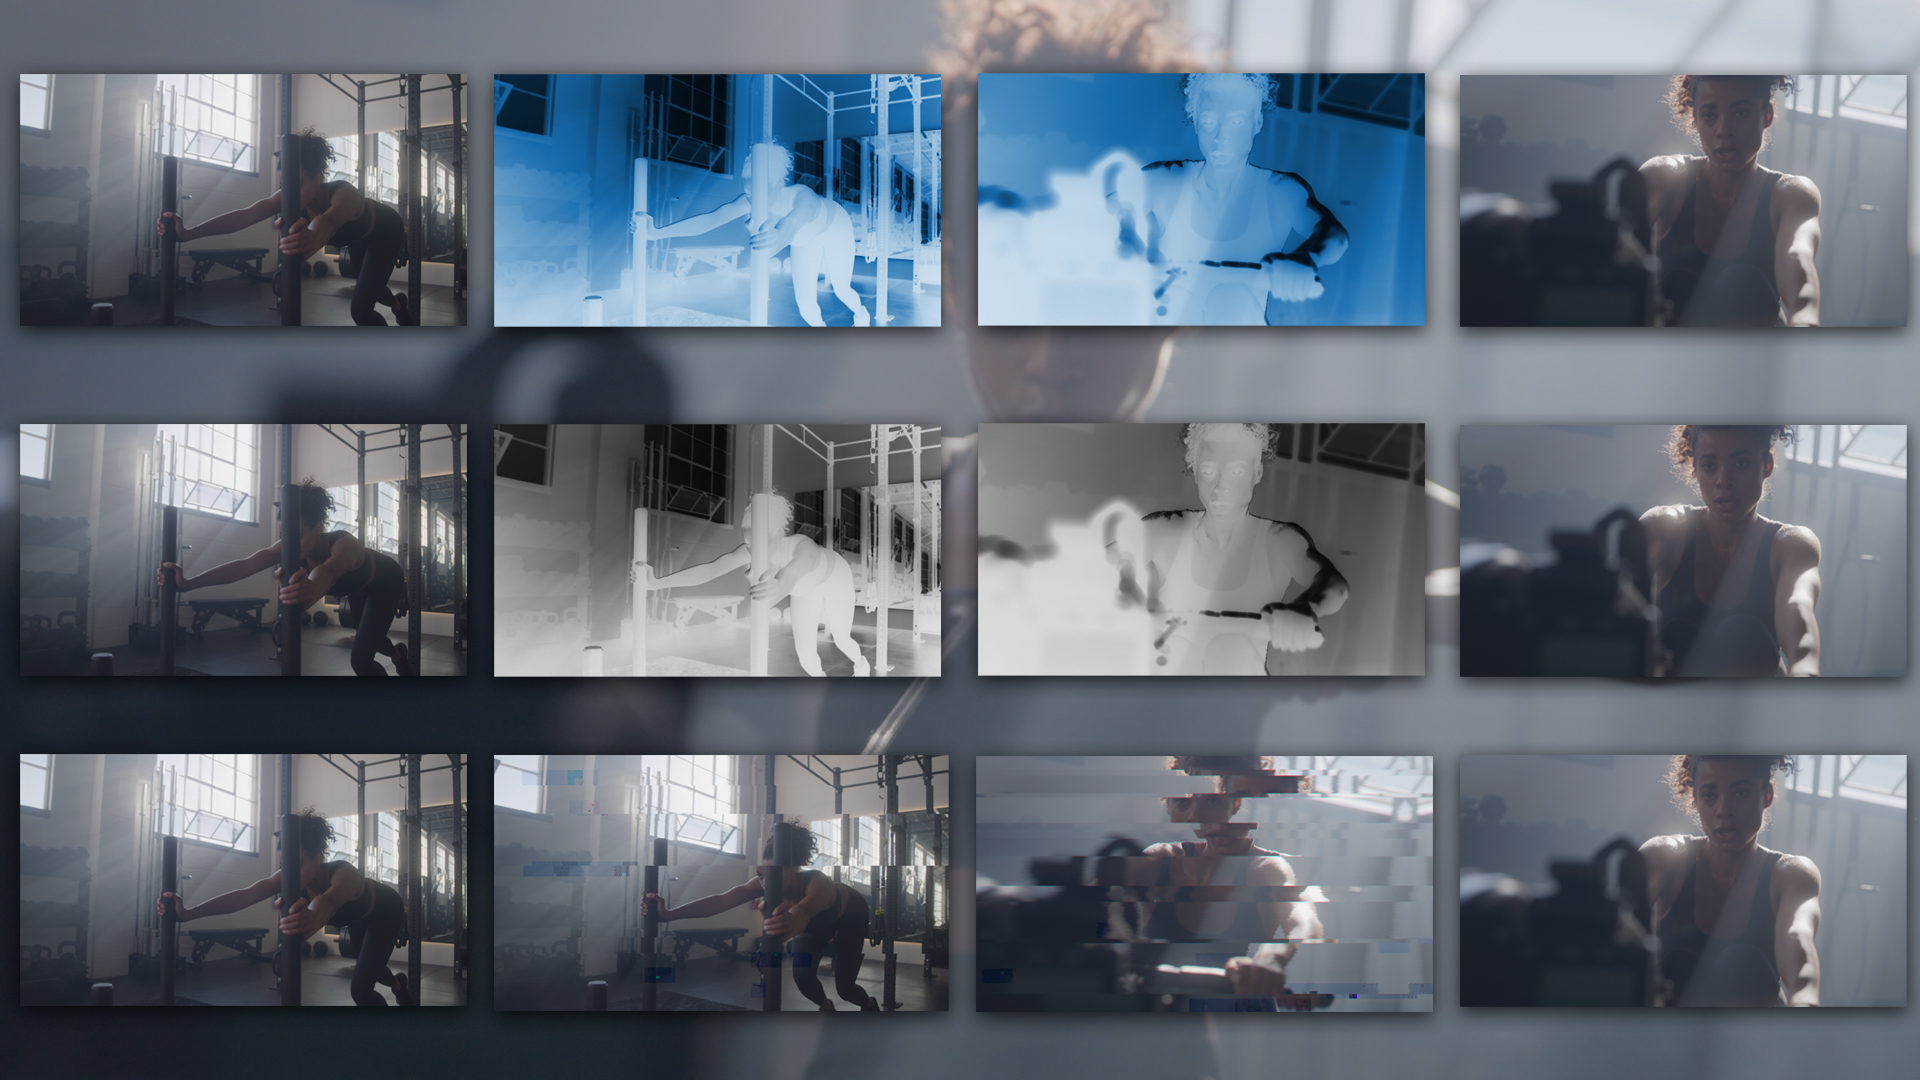
The BCC+ Flutter Cut filter generates a fluttering strobe-like effect over the course of the transition and includes a manual override for those that prefer to have keyframed control over the speed of the transition. There is an option to set the duration of the outgoing and incoming frames as well as the option to intersperse solid color frames between the clip source frames. Also included in the Flutter Cut are many visual effect options, such as blur, grunge, glitch, x-ray, color inversion etc, that can be added to the outgoing clip, the incoming clip or both.
Presets and the FX Editor
The FX Editor provides a convenient way to store and retrieve factory installed and/or user generated filter presets. To select a preset, open the FX Editor interface and pick one from the Presets panel. Click the apply button in the FX Editor to return to the host user interface.
To save a custom preset, click the “Create Custom Preset” icon in the top right corner of the parameter list, next to the filter name, set a name for the new custom preset in the dialog that appears and click done.
Filter Parameters
Animation: Menu controlling what drives the animation of the transition.
- Auto – automatically generates a transition based on the transition length (when used as a transition) or the clip length (when used as a filter).
- Manual – requires the user to set keyframes to control the transition progression. Can be useful in customizing the exact timing of the transition or when applying the filter as a stylized effect as opposed to a direct NLE-style transition.
Amount: Disabled/Hidden by default. When the Animation menu is changed to Percent Done then this slider can be manually keyframed to control the transition progression.
Layer to Reveal – This layer selection popup is not relevant when you have applied the filter as a true NLE-style transition and it will be hidden or disabled in that context. When applied as a normal “effect” as opposed to a transition, however, this menu is used to select the “Incoming” or “Reveal” layer for the transition.
Outgoing Clip Settings
Outgoing Start Frames: The number of consecutive frames from the outgoing clip in each sequence at the start of the effect.
Outgoing End Frames: The number of consecutive frames from the outgoing clip in each sequence at the end of the effect.
Outgoing Acceleration: The rate at which the number of consecutive outgoing frames changes from the Start setting to the End setting as the effect progresses. At the default setting of 100, this change takes the whole length of the effect, Increasing Acceleration causes the End setting to be reached before the end of the effect.
Outgoing Fadeout: This adds a dissolve from the outgoing clip to the Flutter Cut sequence, softening the start of the effect. At the maximum value of 100, this dissolve lasts for the whole length of the effect.
- Note: the effect always starts with a sequence of clips from the outgoing clip.
Incoming Clip Settings
Incoming Start Frames: The number of consecutive frames from the incoming clip in each sequence at the start of the effect.
Incoming End Frames: The number of consecutive frames from the incoming clip in each sequence at the end of the effect.
Incoming Acceleration: The rate at which the number of consecutive incoming frames changes from the Start setting to the End setting as the effect progresses. At the default setting of 100, this change takes the whole length of the effect, Increasing Acceleration causes the start value to be held at the start of the effect , with a faster acceleration that starts later in the effect. All settings of this control will result in the number of consecutive frames reaching the end setting at the end of the effect.
Incoming Fadein: This adds a dissolve from the Flutter Cut sequence to the incoming clip, softening the end of the effect. At the maximum value of 100, this dissolve lasts for the whole length of the effect.
Colors
Color: Used to set the color of the two color effect parameters. In it’s default state each color picker is white. By selecting a color with the color chip, each color picker can be set to any RGB value. With the eyedropper, each color picker color can be selected directly from the image pixels.
Color Frames: The color inserted into the sequence when Color 1 Frames is > 0.
Color 1 Order: This determines where the color 1 frames appear in the Flutter Cut sequence. The choices are:
- Before Incoming: Color 1 frames are inserted before the start of each sequence of frames from the incoming clip.
- After Incoming: Color 1 frames are inserted after the end of each sequence of frames from the incoming clip.
- After Outgoing: Color 1 frames are inserted after the end of each sequence of frames from the outgoing clip.
- After Both: Color 1 frames are inserted after the end of each sequence of frames from either clip.
- Off: Color 1 is not used.
Color 2 Controls: These are identical to the Color 1 controls above. Note that if both colors are used, color 1 precedes color 2.
Effects
Type: Used to select the specific effect to be inserted into the frame sequence.
- Off
- Directional Blur
- Film Grunge
- Invert
- Invert Monochrome
- Monochrome
- Video Glitch
- XRay
Target: Used to select the target clip to apply the effect.
- Outgoing
- Incoming
- Both
- Custom Pattern
Effect Amount: Used to set the intensity of the selected effect within the transition.
Normal Frames Before: Used to set the number of normal frames prior to the effected frames.
Effect Frames: Used to set the number of effected frames.
Normal Frames After: Used to set the number of normal frames following the effected frames.
Directional Blur
Direction: Used to set the angle of the blur.
Blur: Used to control the main blur amount.
Video Glitch
Random Seed: Use to set the starting seed for the animation.
Intensity: used to adjust the intensity for the glitch effect.
Film Grunge
Randomize: Randomizes the various grunge effects.
X-Ray
Opacity: Used to set the opacity and overall intensity of the x-ray effect.
Color: Used to set the color of the x-ray. In it’s default state the x-ray is white. By selecting a color with the color chip, the x-ray can be set to any RGB value. With the eyedropper, the x-ray color can be selected directly from the image pixels.
GPU Rendering: allows for the selection of GPU or CPU software rendering.
- Default: Uses the GPU to render the effect.
- 16 bit float
- 32 bit float
- Disabled: disables GPU rendering and allows for CPU software rendering.